
Build a Robot in Simulation Series 1 - Furuta Pendulum
Save time, money and space when building a robot. Video demo at the end.

Hardware is hard. A moving hardware such as a robot is harder I think.
I have experienced this for many many times ever since I first dabbled in robotics. And it is only very recently that I started to feel that maybe I can change it.
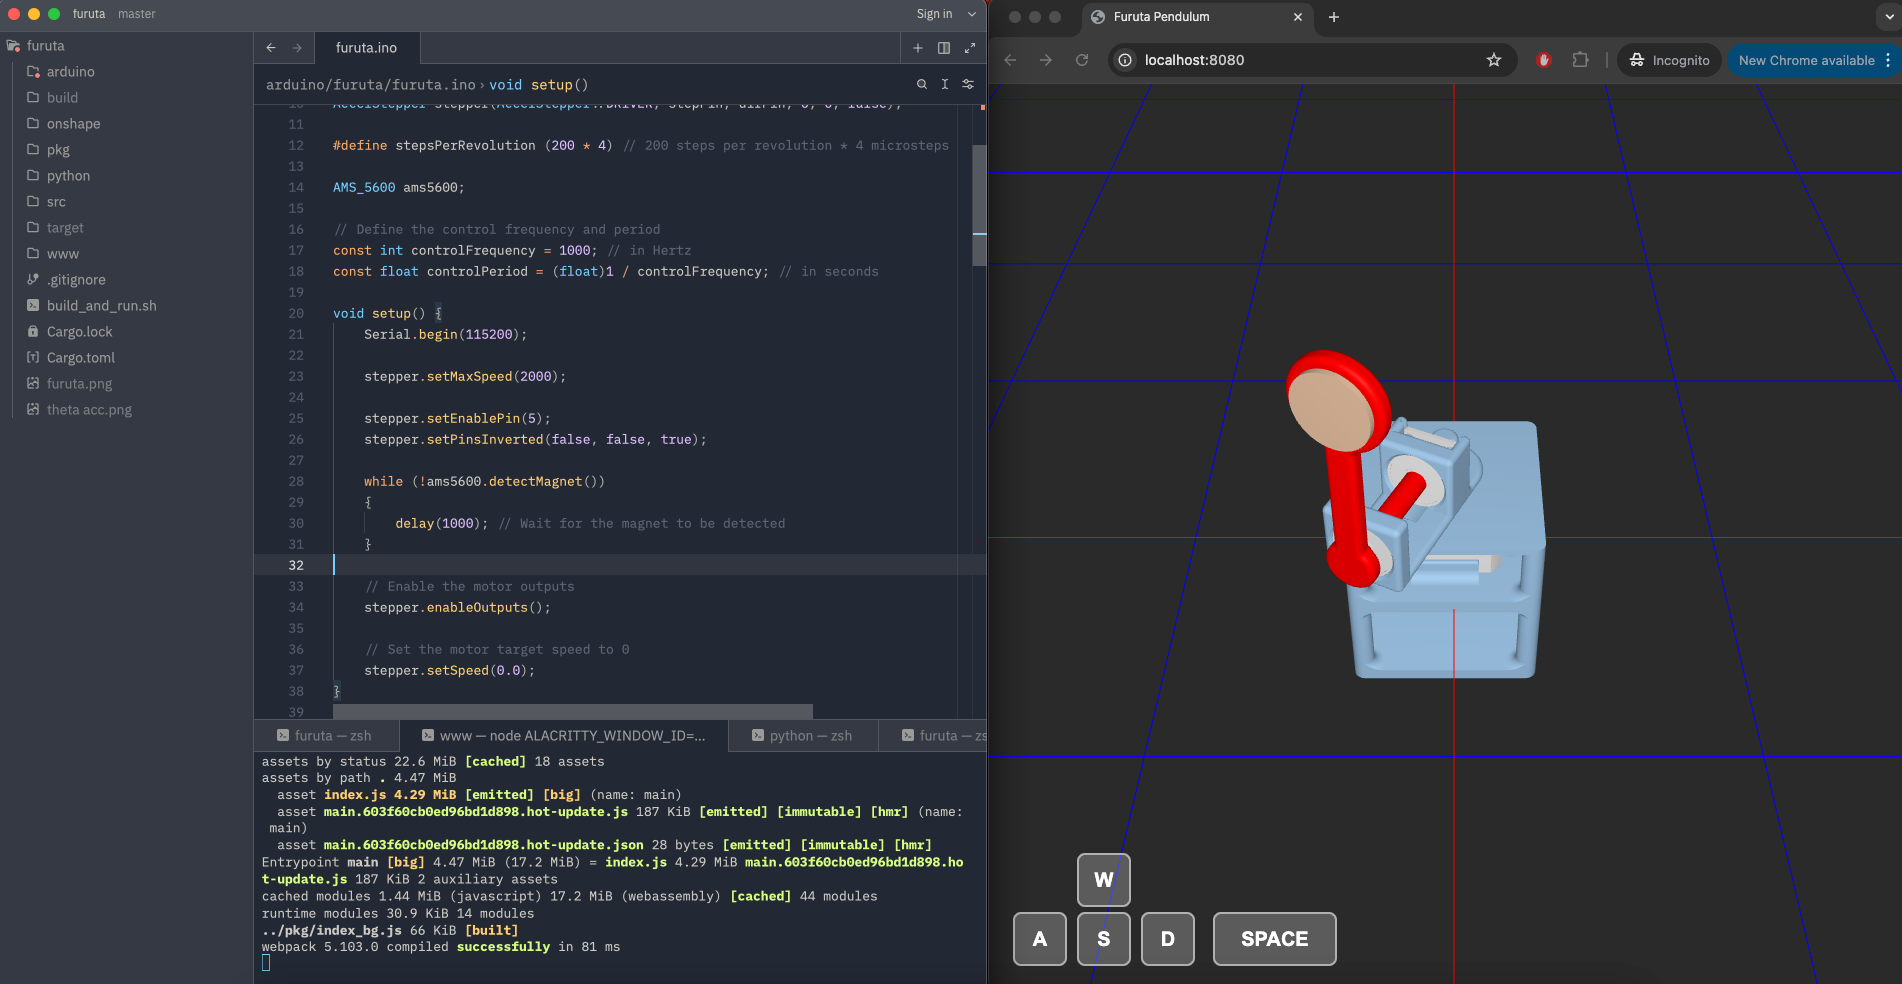
In short, I am building a simulator that can simulate a robot end-to-end. By end-to-end, it means that you can write embedded code (code that can actually run on the ultimate hardware), and see how the robot would behave physically in simulation. You can also swap out the motors, change circuit connections and etc.
The goal of this blog series is to demo the robots built this way, at the same time as I keep building out the simulator.
And the very first robot in this series is the Furuta pendulum, a.k.a. rotary inverted pendulum. Here is a video of what Furuta pendulum is like (by Ben Katz):
Its only actuator is the motor at the base, and the goal is to use rotary motion at the base to swing the pendulum to the top and balance. As you can imagine, this is a nonlinear under-actuated control problem.
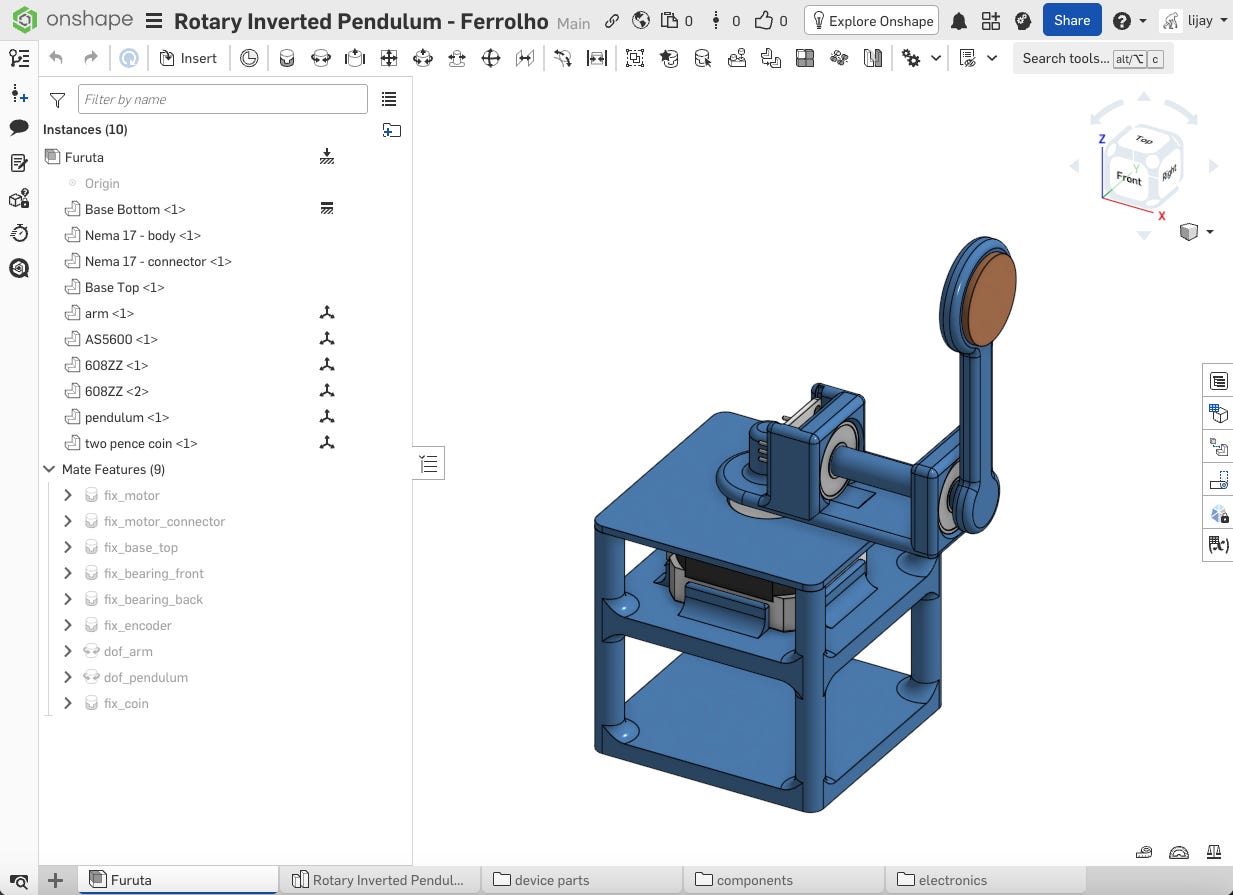
I decided to simulate a Furuta pendulum to test and demonstrate my simulator, and I used Henrique Ferrolho’s project as the reference design for the robot.
The first step is to recreate the mechanical structure of the Furuta pendulum. Luckily Henrique has his CAD files open-sourced, so I just needed to clean it up a little bit, and export to URDF file.
Next, I needed to connect the electrical components correctly in simulation code. For this project, it means connecting the step pin and direction pin for the stepper motor driver, and connect the magnetic encoder to the I2C bus.
Lastly, I wrote Arduino code, just like one would for a real robot. Code is here. The reference project only has a PID balancing controller, but I wanted a controller that can both swing the pendulum to the top, and balance the pendulum around the origin. So I implemented the energy-shaping swing-up control and the LQR balancing control. It was not straightforward, since I use a stepper motor, rather than a torque-output motor, but the fact that I could easily reset and test the code in simulation probably saved a lot of time and headache.
The end result is this:
If you are interested in future posts, you are welcome to subscribe down below. You can also join the Discord channel here: https://discord.gg/p4DfNWac
The next post is likely gonna be for a robot that is a bit more complicated.
But you can also vote for what you want to see next here: https://forms.gle/5QSyYBBi7GCGRt5CA
Code repositories:
Physics engine: https://github.com/one-for-all/gorilla-physics
Arduino & motor & sensor simulator: https://github.com/one-for-all/avr8rs
Furuta pendulum: https://github.com/one-for-all/furuta-sim